![htc-10-evo-bolt-root]()
Now that you’ve landed here, to install TWRP recovery your HTC Bolt, or the HTC 10 Evo, as it’s known outside USA, we can assume that you are looking to either root it or flash custom ROMs or mods on it. Well, welcome to the world of Android modding.
Make sure that that you must have unlocked your bootloader of your device. If not then please do unlock the bootloader of your HTC Bolt/10 Evo — for help, check out the link to bootloader unlock at the top of the guide below. Flashing a custom Recovery enables you to do a whole range of things that HTC generally does not want people to do.
This includes removing the stock ROM from the OEM and flashing (or installing) a custom ROM. A custom ROM is a modified version of the Android OS made by developers or by other people who do it for a hobby.
Now that we’ve established what a ROM is, let’s get back to a custom Recovery. TWRP is not your standard run of the mill recovery. Carrying a range of functions, the TWRP recovery is a powerful tool that essentially let’s you install, backup or restore ROMs. Alongside that, you can use the in built file manager, and carry out other basic tasks and tweaking.
Read: HTC U Ultra Root and TWRP recovery
Coming to rooting your HTC Bolt/10 Evo, almost all custom ROMs feature root by default, where all you have to do is to enable then in the Developer Settings. There are a few exceptions, with Lineage OS being the biggest one. Including ROMs similar to the latter and stock ROMs, you will need to flash the SuperSU zip as per the instructions provided below to get your device rooted.
With a custom ROM installed, you will be able to take proper advantage of things like the secondary display and tune it to your liking. And this tweaking and tuning is applicable on each and every bit of hardware on the device.
Read: Huawei Honor 6X Root and TWRP
You must take full responsibility for any damages that may occur. So, as a word of caution, it’s best not to play with things you do not understand and only tinker with what you do know. Another good habit to develop would be to take a ROM backup before you venture into flashing a new/experimental ROM. This way you can always go back to what used to work.
Now that you have a general idea of what works how, let’s begin with getting TWRP onto your device right away.
How to Install TWRP on HTC Bolt/10 Evo
Step 0: Well, make sure you have unlocked bootloader of your HTC U Ultra first, before trying to install TWRP recovery or gaining root access on it. For help, check our guide on unlocking bootloader of HTC devices (including U Ultra).
Download HTC Bolt/10 Evo (aca) TWRP recovery
-
- Get the TWRP recovery .img file from the download link above and save it to a separate folder on your PC.
- Setup ADB and Fastboot on your PC, follow this link .
- Enable USB debugging on your device:
1. Open Settings on your device.
2. Go to About phone and tap seven times on Build number, this will enable Developer options.
3. Now go back to Settings and you’ll see Developer options there, open it.
4. Tick the USB Debugging checkbox.
- Open the folder where you saved TWRP Recovery .img file in Step 1 above.
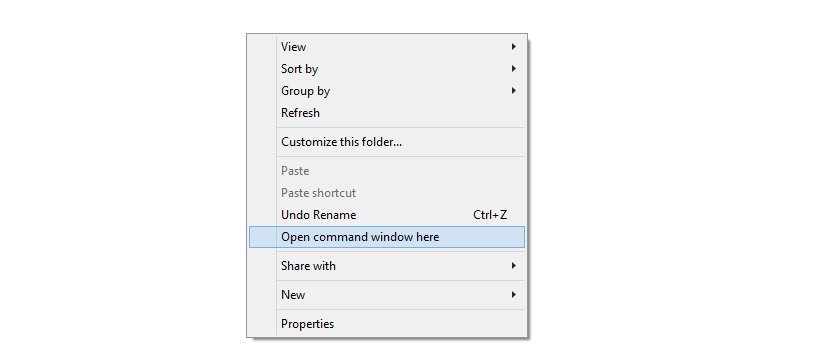
- Now open a command window inside that folder. To do that, “Shift + Right click”on any empty white space inside the folder and then select “Open command window here” from the context menu.
- Connect your device to the PC. And type the following into the command window we opened in Step 5 above to boot your device into bootloader/fastboot mode:
adb reboot bootloader
└ If you get a permission dialogue on your device to “Allow USB debugging”, tap OK.
- Once your device boots into bootloader mode, issue the following command into command window to flash the TWRP recovery .img file:
fastboot flash recovery twrp.img
└ Here modify twrp.img with the name of your TWRP recovery .img file, OR change your TWRP recovery filename to twrp.img and use the command above.
- Once TWRP is successfully flashed on your device, issue the following command to reboot:
fastboot reboot
That’s all. TWRP recovery should be installed on your device now. To boot into the freshly installed recovery, simply issue the adb reboot recovery command from PC command line when your device boots into system.
How to Root HTC Bolt/10 Evo
Once you’ve got TWRP recovery installed on your HTC Bolt/10 Evo, you can finally root it by simply flashing the SuperSU zip. Follow the step-by-step guide below to successfully root your HTC Bolt/10 Evo.
Download SuperSU 2.79 (.zip)
- Download and transfer the SuperSU zip file from the download link above to your HTC Bolt/10 Evo’s storage.
- Boot your HTC Bolt/10 Evo into TWRP recovery.
- Tap on Install and select the SuperSU zip file that you transferred to your device in Step 1.
- After selecting the .zip file, do Swipe to Confirm Flash on the bottom of screen to begin the flashing process.
- Once SuperSU is flashed, you’ll get Reboot System option, select it.
That’s all there is to it. Your HTC Bolt/10 Evo should be rooted now. To verify, download/install any root checker app from the Play Store.